
How NetSuite to Jira Integration Works Using Celigo (Part 1)
What is Celigo?
Celigo is an Integration tool that allows you to connect your business applications and transfer data between those applications automatically.
The Celigo comes under the IPAAS category i.e., Integration Platform as a Service.
What is Jira?
Jira is a Software developed by Australian company known as Atlassian. Jira Software is used for project management, so it includes planning, tracking, reporting, releasing of projects etc. It is used mostly by software development teams to track bugs, issues, epics and other tasks.
What is NetSuite?
NetSuite Software is an online Software which is used for companies to manage all the main business processes in a single system.
Company uses NetSuite for (ERP) Enterprise Resource Planning and to manage Accounting, Inventory, Customer Relationship Management System (CRM), Professional Services, and Ecommerce.
NetSuite comes under the SaaS category i.e., Software as a Service as well as under PaaS category i.e., Platform as a Service. This means it is built for the cloud and designed to interact well with other software systems.
What records will you be able to sync between NetSuite & Jira using Celigo?
- Sync Jira issues to NetSuite issues
- Sync NetSuite issues to Jira issues
- Sync Jira issues to NetSuite cases
- Sync NetSuite cases to Jira issues
- Sync NetSuite case details to Jira issues comments
- Sync NetSuite case assignments to Jira issue assignees
- Sync Jira users to NetSuite customers
- Sync NetSuite customers to Jira users
- Sync NetSuite projects to Jira projects
- Sync Jira issues of type task to NetSuite project tasks
- Sync NetSuite project tasks to Jira issues
- Sync Jira time tracking to NetSuite time tracking
- Sync NetSuite employees to Jira users
- Sync Jira Issue to NetSuite Project (custom field)
- Sync NetSuite Project to JIRA Issue (custom field)
- Sync NetSuite Customer to JIRA Issue (custom field)
From the above list we will be looking at What are the steps used to Integrate data from NetSuite to Jira?
CONNECTIONS
- Set up a connection to NetSuite
- Set up a connection to JIRA
A. Set up a NetSuite connection
To establish a connection to NetSuite there are two ways.
- On the home page of Celigo click on the Resources menu present on navigation bar, after that click on Connections. Then, click + Create connection at the top right.
or
- When you are working or creating a new Integration in Celigo, there is an option to add a connection in that flow. You just need to click on Add Source or Add destination/lookup.
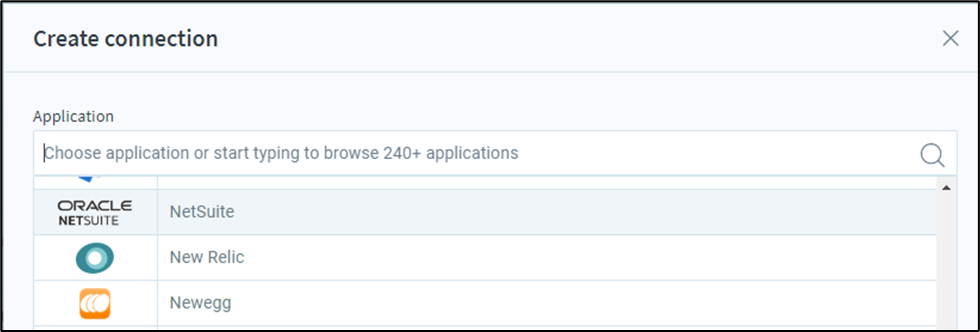
When you click on Create Connection a list will be opened then you need to select specific option from that list.
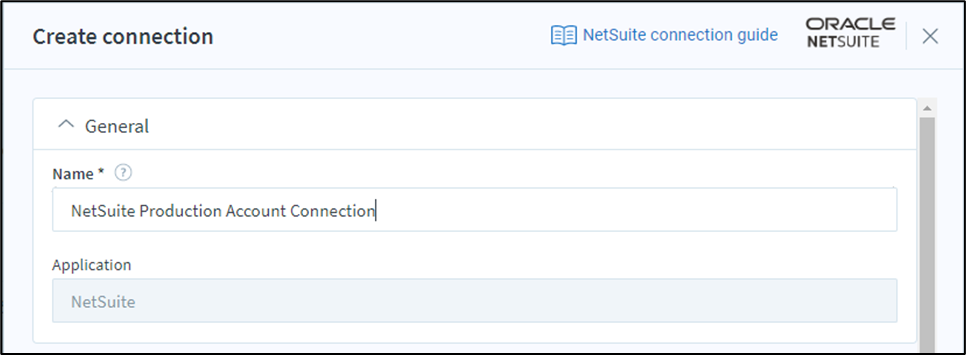
B. Describing your NetSuite connection
After selecting the specific application from the above list, a general setting menu will appear.
Name: The name field is a mandatory field. So, at the very first you need to provide the relevant, clear and distinguishable connection name. Because whenever you are creating a new integration, the name will act as a unique identifier and help you to better select the proper connection from the list of multiple connections that you’ve created.
Application: The Application field is mandatory and non-editable field which just displays the name of the Application that you have selected for the connection.
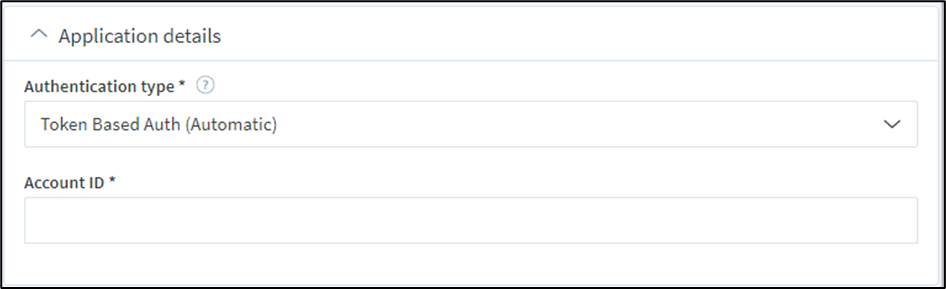
C. Entering NetSuite account information
In this step, you will be given an option to provide NetSuite authentication.
Authentication type: The authentication type field is mandatory.
So, here there are basically two options available for us from that we have to select any one of the following.
- Token Based Auth (Automatic)
- Token Based Auth (Manual)
- Token Based Auth (Automatic)
Account ID: The Account Id field is mandatory. In this field you need to enter the proper account Id of NetSuite account on which you want to create a connection.
You will be able to get the Account Id from NetSuite by following the steps below.
- You need to sign into your NetSuite account.
- Select Company > Company information under the Setup menu.
If you fail to obtain the account Id from the above steps then you need to contact NetSuite support.
- Token Based Auth (Manual)
Environment Type: This is an optional field in which we need to provide the account environment type. We will have three options in this field.
- Beta
- Production
- Sandbox
Account ID: This field will act the same as automatic authentication process but the only thing here is that this field will be optional for manual authentication process.
Token ID: This field is mandatory.
Before creating the Token access in your NetSuite account, you need to make sure that you have installed the 'Celigo integrator.io' Suite App (i.e., the Bundle with id 20038) in your NetSuite account.
So, once you have created the access token in your NetSuite account, 'Token Id' and 'Token Secret' will be displayed only once (on the token confirmation page inside NetSuite). Please copy and paste 'Token Id' somewhere before you leave the confirmation page as it will be displayed only once.
Token secret: This field is also mandatory and you need to add the secret key which was displayed to you after creating the access token in your NetSuite account.
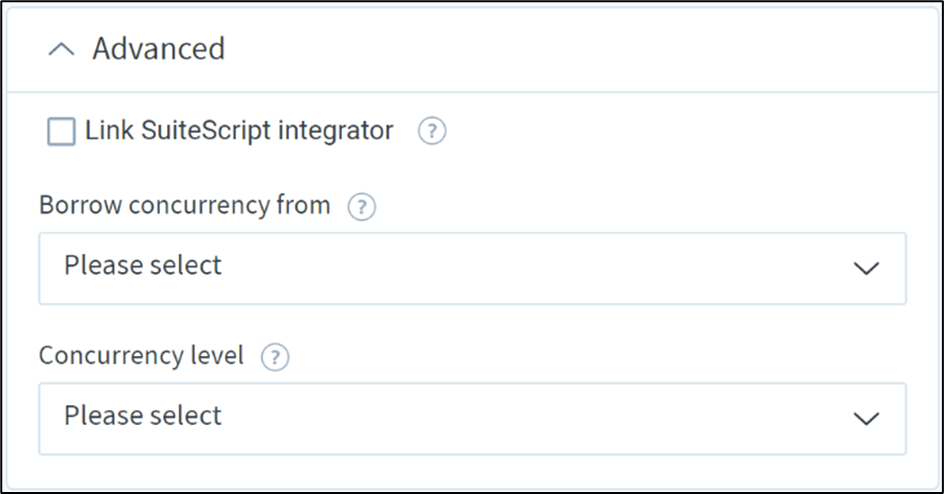
D. Edit advanced NetSuite settings
There is an opportunity to provide additional configuration information, if needed as this is optional, for the NetSuite connection before proceeding.
Link SuiteScript integrator: The Link SuiteScript integrator check box is not mandatory. This option is only available when editing a NetSuite connection. This option is only available for the old integrations.
Prior to integrator.io, The NetSuite integrations which were built by Celigo ran directly inside your NetSuite account via a managed bundle. that ran directly inside your NetSuite account. Check this box to link integrator.io to your NetSuite account if you're still using any of these previous integrations.
Borrow concurrency from: Borrow concurrency from option isn't mandatory. You'll be able to select another connection from the menu. By default, all data flowing through a connection record will be submitted to the respective endpoint application at the concurrency level configured for that connection record. There are use cases however where you would like multiple connections to share the identical concurrency level, and this field allows you to specify that a connection should borrow concurrency from another connection specified the information flowing through both connections will get submitted to the endpoint application together via a shared concurrency model. for instance, you would possibly have three separate NetSuite connection records in your integrator.io account (for the aim of isolating different permissions for various integrations), but you merely want to provision one concurrent request for all three NetSuite connection records to share. To implement this use case, you'd find one in every of the three connections with a concurrency level 1, and so you'd find the opposite two NetSuite connections to borrow concurrency from the opposite.
Concurrency level: Concurrency level field isn't mandatory. Set this field to a worth of up to 25 to limit the amount of concurrent HTTP requests the connection resource can handle at any given time, or leave it blank to use burst mode. Integrator.io's burst mode sends HTTP requests as quickly as possible, with a high level of concurrency.
WSDL version: When creating or editing a NetSuite connection, new Web Services Description Language (WSDL) versions are available. an online service description language, or WSDL, is an XML document that describes the foremost recent versions of an online service. you'll update to a brand new or previous version of NetSuite's web services by selecting WSDL.
E. Save and test the connection
Once you've finished the NetSuite Connection configuration, simply click on the Save & authorize button. You'll then be asked to sign into your NetSuite account to finish the connection. subsequently you'll be asked to permit access to your NetSuite page.
If NetSuite authorizes your login, the new connection is now successfully added to your account in Online status. it'll be applied to the present source or destination app, if you created it within a flow. Otherwise, you'll proceed to register the reference to an integration.


 Strictly Necessary Cookies